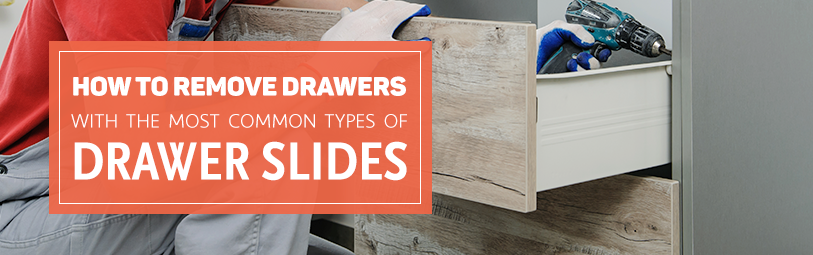
How to Remove Drawers With the Most Common Types of Drawer Slides
At some point, you'll probably find a reason to remove the drawers from one of your cabinets, dressers, or a similar piece of furniture. Whether you’re moving the furniture and need to make it lighter before transport, cleaning the piece out, or if you need to make a quick repair, removing the drawers is usually the first step. The process of removing drawers is usually simple, but it will vary depending on the type of drawer slides you're working with. Below are instructions for removing drawers from the most common types of drawer slides.
Metal Glides with Lever

Metal-glide slides with levers are the most common type of drawer slide, so there’s a good chance your furniture is equipped with this kind of hardware. To remove drawers from a metal glide, follow these steps:
1. Start with the top drawer. This rule applies to any type of furniture with drawers; if you need to work on more than one drawer, start at the top and work your way down. This prevents the furniture from becoming top heavy, which may be dangerous and can result in the furniture tipping over. Starting at the top and working down is safest and easiest because it keeps the bulk of the weight at the bottom.
2. Stand in front of the piece of furniture and slide the drawer open as far as you can, with one hand on each side of the drawer. Don’t stand too close—leave enough space to allow the drawer to open to its natural stopping point.
3. Locate the track levers, which should be in the center of each drawer track. They will be either straight or curved depending on your particular piece of furniture. Full-extension drawer slides will typically have straight levers, while three-quarter slides (more common on smaller drawers) will probably have a curved-track disconnect lever.
4. Use both hands to simultaneously press both levers. If it’s a straight lever, this process is extremely simple: just press down as far as you can. For a curved lever, you’ll need to push on the curved area until it flattens out.
5. Hold down the levers, and pull the drawer out toward your body. It should easily lift out of the furniture. The tracks will likely stick out from the front after the drawer has been removed, so push them back with a straight, parallel motion.
Soft-Close Drawers

Soft-close drawers are often found on custom cabinets and higher-end furniture. Unlike typical rollers and rails, this type of drawer guide helps prevent drawers from being shut too hard—potentially preventing damage—and will also gently slide closed over the last few inches, even if the drawer was not pushed hard enough. If you need to remove soft-close drawers, follow these simple steps:
1. Empty the drawer first. This makes the removal process easier.
2. Pull the drawer open until it’s as far out as possible and the guides are fully extended.
3. Check the drawer guides to see if there is a clip or locking lever. If you find a clip, remove it. If the drawer guides have a lever, push it while pulling the drawer out.
4. Continue pulling the drawer outward until it is completely off of the rails. You might need to tilt the drawer downward to fully remove it.
Wood Glides

Wood-drawer slides are often found on older furniture like armoires or dressers. These drawers often don’t open as smoothly, but they can be removed with a solid tug, as described here:
1. Start with the top drawer, and move from the top to the bottom. This helps to prevent a situation where top-heavy furniture can topple over, although if the body of the furniture is very heavy, this won’t be an issue.
2. Pull the drawer out as far as you can. Don’t worry about pulling it too far because most drawers have a natural stopping point.
3. Use both hands and a bit of force to tug the drawer out toward your body as evenly as possible. If your furniture uses one center wooden track, it will take a bit more effort to remove the drawer, while wood-glide furniture with two side tracks will be a bit easier to work with. Either way, pull with enough force to overcome the resistance. It will eventually pop out.
Stabilizer Screws

In some cases, the drawers in your furniture will have stabilizer screws, which add an extra step to the drawer-removal process. Even so, these drawers and screws come out relatively easily. Just follow the steps below:
1. Be sure to work on the drawers in the proper order, by starting at the top and moving down drawer by drawer. On drawers that hold heavy items, stabilizer screws are often used, so it’s very important to remove them from top to bottom to prevent the piece of furniture from becoming top heavy. This can result in an unstable piece of furniture that can wobble or tip over.
2. Stand in front of the furniture, and leave enough space for the drawer to fully extend. Grab the drawer by its handle, or with both hands, one on each side of the drawer (just be sure to keep your fingers clear of the drawer’s metal tracks).
3. Pull the drawer out as far as possible. Pull all the way until you feel the drawer hit its built-in stopping point.
4. Find the stabilizer screws inside the body of the drawer. There should be two screws. Once you locate them, remove them with the proper screwdriver. Typically, drawers use #8 stabilizer screws, which will require a Phillips-head screwdriver.
5. Find the catch tabs, which should be on both sides of the drawer. Release the catch while pulling upward on both catch-tab mechanisms. You will probably need to pinch the catch tab with your thumb and index finger; this will release the drawer from both side tracks.
6. Pull the drawer out all the way once it’s released. Keep it straight as you pull and lift once it’s completely out. Be careful because even if you emptied the drawer ahead of time, it can still be pretty heavy. Also, once the drawer is removed, take a quick peek at the side of the drawer to see if there is any sort of number on it. This number will often be on a sticker or decal, and it indicates which opening in the furniture the drawer goes in. You’ll need to know this when it’s time to put the drawer back in. Number 1 is typically the top drawer, with subsequent numbers on each of the lower drawers.
7. Push the tracks back in before continuing to work on the piece of furniture. Using a straight, parallel motion, push the center stabilizer track in, along with both side suspension tracks.

Anti-Tip Mechanism (Relatively Common, Usually on Cheaper Furniture)
The drawers in anti-tip furniture have cables attached to them that prevent multiple drawers from being opened at the same time. This helps to keep the furniture from falling over or becoming unsteady—if multiple drawers are open, especially at the top, the piece can become top heavy and tip. The anti-tip cables help remedy that but also add an extra step in the drawer-removal process. However, following these steps can make removing anti-tip drawers easy:
1. Start with the top drawer and work your way down if you’re going to be removing multiple drawers. This helps to keep the weight at the bottom of the furniture. Always remove the top drawer first; it is the safest and easiest way to work on a piece of furniture.
2. Stand in front of the furniture and make sure there is enough space for the drawer to fully slide out. Grab the front handle of the drawer, and extend it outward. Pull out on the drawer until you feel resistance. You can also hold onto the front bottom of the drawer if it’s easier to pull it out that way, but just be sure to keep your fingers away from the drawer’s tracks.
3. Open the drawer completely, and you will be able to easily see the anti-tip cable, which will be attached to the rear exterior of the drawer. Use a screwdriver to unscrew it. Usually, the cable will be affixed to the drawer with a Phillips-head screw, so be sure you have a Phillips-head screwdriver handy.
4. Find and press the disconnect tabs. They will be near the back of the metal tracks, on both the left and right sides. Press down on both tabs at the same time. Be sure to press down fully and continue to press inward as you remove the drawer.
5. Pull the drawer out with the tabs pressed down. As you pull toward you, tilt the drawer upward. It should pull free from the furniture. Be careful because the drawer will likely be heavy. There’s a good chance the side of the drawer will be marked with a number. Make note of it because that number indicates which slot in the furniture the drawer goes in. Usually, the drawers are numbered from top to bottom, with smaller to larger numbers. For example, the drawer marked with a 1 will likely be the top drawer. This makes things easier when it’s time to re-assemble your furniture.
6. Remove the drawer. The tracks will likely be protruding from the furniture slightly. Push the metal tracks back into the piece of furniture before proceeding with working on the piece.
No Drawer is Too Tricky
Regardless of what type of drawer slide you have on your furniture, removing the drawers can be a simple task if you do some research before tackling the job. All you need to do is identify the type of drawer slide you’re working with and follow these step-by-step instructions to get the job done quickly and easily.